
There’s nothing quite like biting into homemade Fried Chicken Tenders with a golden, crunchy coating that gives way to perfectly juicy chicken. But here’s the thing: getting that restaurant-style crunch at home can be tricky. Sometimes the breading falls off, sometimes the chicken turns dry, and sometimes those beautiful crispy strips become disappointingly soggy just minutes after frying. Not this time! This recipe uses a flavorful buttermilk marinade, a seasoned flour coating, and a few simple techniques to create wonderfully crunchy chicken tenders that stay crisp longer. They’re easy to prepare, family-friendly, and absolutely delicious with your favorite dipping sauces.
What Makes These Fried Chicken Tenders So Crispy?
The secret to delicious fried chicken isn’t just the oil or the seasoning. It’s how you prepare the chicken before it ever reaches the pan. A good marinade, the right flour mixture, and proper frying temperature all work together to create that irresistible crunchy exterior.
The Secret Behind the Crispy Coating
For this recipe, we’re combining all-purpose flour with cornstarch. Each ingredient has a specific job.
All-purpose flour creates a sturdy coating that clings to the chicken, while cornstarch helps produce a lighter, crispier texture. Together, they give every tender a beautifully golden crust without making it overly thick or heavy.
A little baking powder also helps create a more textured coating. In addition, adding a tablespoon or two of the buttermilk marinade to the seasoned flour creates small, irregular crumbs. These little pieces turn into delicious crunchy bits during frying.
And honestly, those craggy edges are one of the best parts!
Why Buttermilk Makes Chicken So Tender
Buttermilk is another important ingredient. Its mild acidity helps tenderize the chicken while adding moisture and flavor.
Instead of relying on seasoning the outside alone, we’re allowing the chicken to sit in a seasoned buttermilk mixture before breading. This gives the flavors time to develop and helps prevent dry chicken.
For the best results, marinate the chicken for at least 30 minutes. If you have more time, refrigerate it for up to 4 hours.
| Ingredient | What It Does |
|---|---|
| Chicken tenders | Creates juicy, tender centers |
| Buttermilk | Adds flavor and helps tenderize |
| All-purpose flour | Builds the crispy coating |
| Cornstarch | Creates a lighter crunch |
| Baking powder | Helps create a textured crust |
| Paprika | Adds color and mild flavor |
| Garlic powder | Adds savory flavor |
| Black pepper | Provides gentle warmth |
Ingredients for Homemade Fried Chicken Tenders
You don’t need complicated ingredients or special restaurant equipment to make this recipe. Most of the ingredients are probably already sitting in your kitchen.
Ingredients You’ll Need
For the Chicken:
- 1½ pounds chicken tenderloins
- 1 cup buttermilk
- 1 large egg
- 1 teaspoon salt
- ½ teaspoon black pepper
- 1 teaspoon garlic powder
- ½ teaspoon paprika
- ½ teaspoon onion powder
- 1 teaspoon hot sauce (optional)
Crispy Breading:
- 1 cup all-purpose flour
- ½ cup cornstarch
- 1 teaspoon baking powder
- 1 teaspoon paprika
- 1 teaspoon garlic powder
- ½ teaspoon onion powder
- ½ teaspoon salt
- ½ teaspoon black pepper
- ¼ teaspoon cayenne pepper (optional)
For Frying:
- Vegetable, canola, or peanut oil, as needed
Ingredient Substitutions and Helpful Notes
You can easily adjust this recipe depending on what’s available in your kitchen.
Chicken breast: Don’t have chicken tenderloins? Slice boneless, skinless chicken breasts into evenly sized strips. Try to keep them similar in thickness so they cook at approximately the same rate.
Buttermilk: If you don’t have buttermilk, combine 1 cup of milk with 1 tablespoon of lemon juice. Let it stand for about 5 minutes before using.
Cornstarch: This ingredient helps create a lighter coating. If you don’t have it, you can use additional flour, although the finished crust may have a slightly different texture.
Seasonings: Feel free to adjust the paprika, garlic, onion powder, and cayenne pepper. For a little extra heat, increase the cayenne.

How to Make Fried Chicken Tenders Step by Step
Making homemade crispy chicken tenders is easier than you might think. The process has four simple stages: marinating, breading, resting, and frying.
Marinate the Chicken
Start by placing the chicken tenderloins in a large mixing bowl.
Add the buttermilk, egg, salt, black pepper, garlic powder, paprika, onion powder, and optional hot sauce. Whisk everything together until the chicken is evenly coated.
Cover the bowl and refrigerate for at least 30 minutes.
During this time, the buttermilk mixture helps flavor the chicken while keeping it moist and tender.
Before moving to the next step, prepare a wire rack over a baking sheet. You’ll use it to hold the breaded chicken.
Prepare the Crispy Flour Mixture
In a separate wide bowl, combine the flour, cornstarch, baking powder, paprika, garlic powder, onion powder, salt, black pepper, and cayenne pepper.
Whisk everything together until evenly distributed.
Here’s a little trick: drizzle 1–2 tablespoons of the buttermilk marinade into the flour mixture. Rub it gently with your fingertips or a fork until small clumps form.
Those little flour clusters help create a more textured, crunchy crust.
Coat the Chicken Properly
Remove one chicken tender from the marinade, allowing excess liquid to drip off.
Place it into the seasoned flour mixture. Press the flour firmly onto every side, making sure the chicken is completely covered.
For an extra-crispy coating, dip the chicken back briefly into the buttermilk mixture and coat it in the flour again.
Transfer each coated tender to the prepared wire rack.
Repeat until all the chicken pieces are breaded.
Now, let them rest for about 10–15 minutes. This helps the coating adhere to the chicken and reduces the chance of it falling off during frying.
Fry Until Golden and Crunchy
Pour enough oil into a heavy-bottomed skillet or Dutch oven to create approximately 1½–2 inches of depth.
Heat the oil to around 350°F (175°C), using a kitchen thermometer to monitor the temperature.
Carefully add a few chicken tenders at a time. Avoid overcrowding the pan because too many pieces can lower the oil temperature and produce a greasy coating.
Fry for approximately 3–5 minutes per side, depending on the thickness of the chicken.
Turn the tenders carefully until both sides become beautifully golden brown.
Check the thickest part of the chicken with an instant-read thermometer. The internal temperature must reach 165°F (74°C).
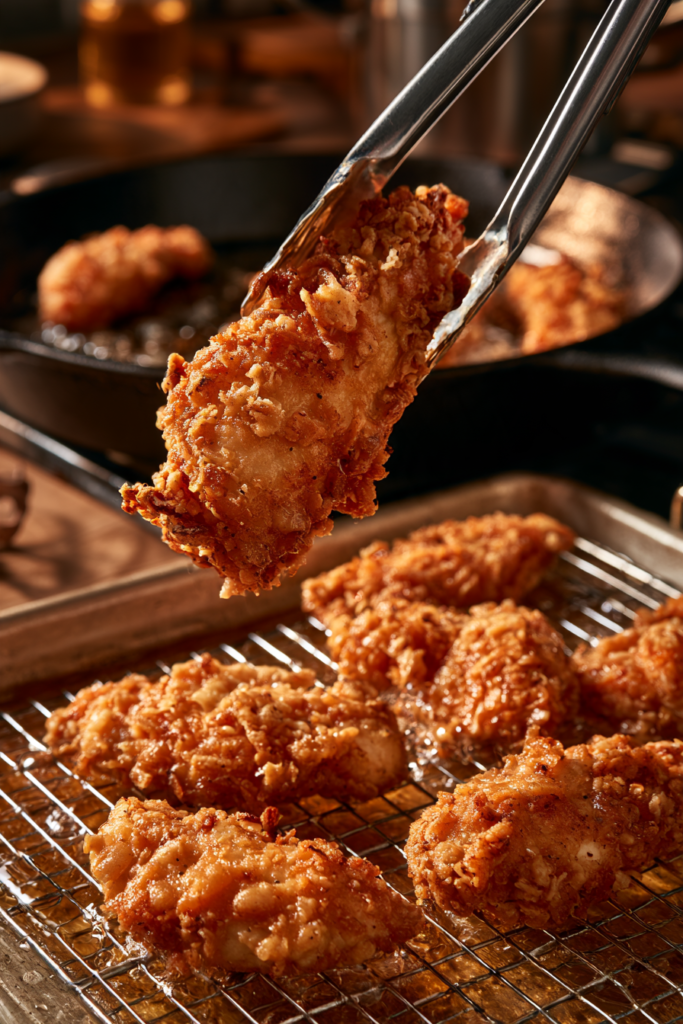
Transfer the cooked chicken to a clean wire rack set over a baking sheet. This allows excess oil to drain while air circulates around the crispy coating.
Repeat with the remaining chicken.
Serve immediately while the outside is crunchy and the inside is juicy!
Expert Tips for Fried Chicken Tenders That Stay Crunchy
Making crispy chicken is one thing. Keeping that crunch after frying is another. Fortunately, a few simple techniques make a noticeable difference.
Keep the Oil Temperature Consistent
Temperature control is probably the most important part of frying chicken tenders.
If the oil is too cool, the coating absorbs more oil and becomes greasy. On the other hand, oil that’s too hot can brown the outside before the chicken cooks completely.
Aim for approximately 350°F (175°C) and allow the temperature to recover between batches.
A deep-fry thermometer makes this much easier.
Always Use a Wire Rack
Once the chicken comes out of the oil, avoid stacking the tenders on top of one another.
Instead, arrange them in a single layer on a wire rack.
Why does this matter?
When hot fried chicken sits directly on a flat plate, steam gets trapped underneath. That moisture softens the breading and takes away the crunch.
A wire rack allows air to circulate around the entire piece, helping the coating stay crisp.
If you’re preparing several batches, place the finished tenders on a rack inside an oven set to approximately 200°F (95°C) while you finish frying.
Don’t Skip the Breading Rest
It might be tempting to move the chicken straight from the flour into the hot oil. However, allowing the coating to rest for 10–15 minutes helps it adhere more securely.
This small step can make a big difference in the finished texture.
Fry in Small Batches
Give every chicken tender enough room to cook properly.
Crowding the pan lowers the oil temperature and prevents the pieces from frying evenly. Therefore, work in smaller batches rather than trying to cook everything at once.
| Common Mistake | Better Solution |
|---|---|
| Oil isn’t hot enough | Maintain approximately 350°F |
| Chicken becomes greasy | Avoid overcrowding |
| Breading falls off | Rest coated chicken before frying |
| Bottom becomes soggy | Drain on a wire rack |
| Outside browns too quickly | Reduce the heat slightly |
| Chicken becomes dry | Check internal temperature |
What to Serve with Crispy Chicken Tenders
These homemade tenders are incredibly versatile. You can serve them as a quick lunch, a family dinner, or even as a party appetizer.
The Best Dipping Sauces
A good dipping sauce makes crispy chicken even more enjoyable.
Here are a few delicious options:
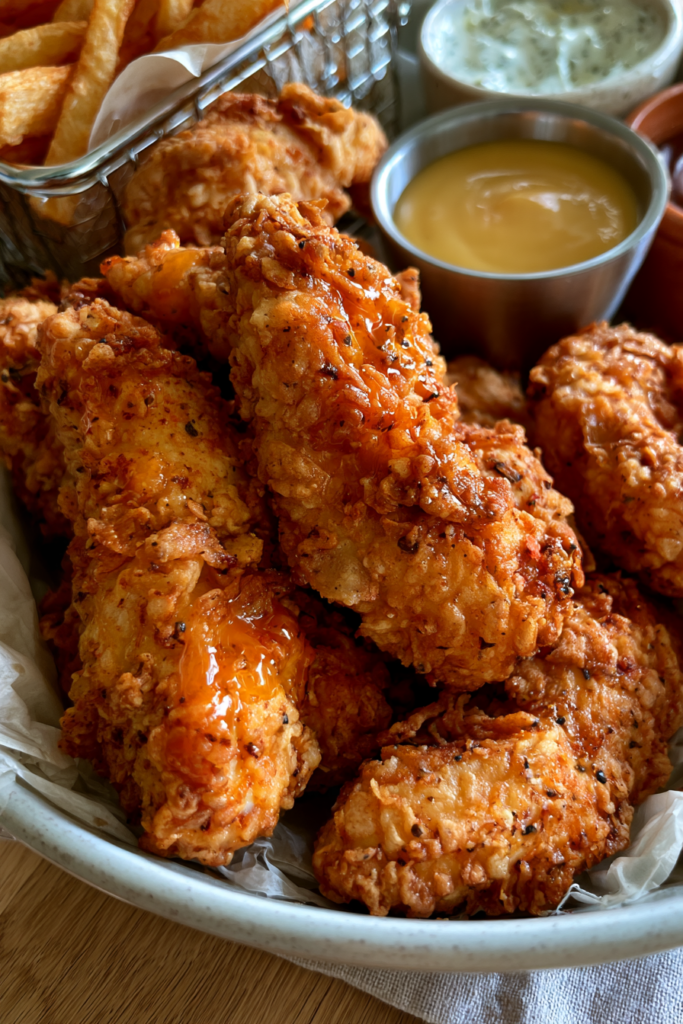
- Honey Mustard: A sweet and tangy combination that pairs beautifully with savory chicken.
- Homemade Ranch: Creamy, cool, and full of herbs.
- BBQ Sauce: A smoky, slightly sweet option.
- Buffalo Sauce: Perfect if you enjoy spicy flavors.
- Garlic Parmesan Sauce: Rich, savory, and wonderfully creamy.
You can even arrange several sauces in small bowls and let everyone choose their favorite.
Delicious Side Dishes
For a complete meal, serve the chicken tenders with crispy potatoes, fresh salads, or vegetables.
A few ideas include:
- Crispy French fries
- Creamy mashed potatoes
- Coleslaw
- Macaroni and cheese
- Roasted vegetables
- Fresh green salad
For more inspiration, try these recipes from Morselmoon:
Frequently Asked Questions About Fried Chicken Tenders
How Do You Keep Fried Chicken Tenders Crispy?
The most important things are maintaining the correct oil temperature, avoiding overcrowding, and draining the cooked chicken on a wire rack instead of stacking it on a plate.
For longer serving times, keep the tenders in a single layer on a wire rack inside a 200°F (95°C) oven.
Why Is My Fried Chicken Breading Falling Off?
This usually happens when the chicken is too wet, the coating isn’t pressed on properly, or the chicken goes straight into the oil without resting.
Allow excess marinade to drip off before breading. Then press the flour mixture firmly onto the chicken and let the coated pieces rest for 10–15 minutes.
Can I Make Chicken Tenders Without Buttermilk?
Absolutely! You can use the milk and lemon juice substitute mentioned above. However, traditional buttermilk provides a distinctive flavor and works particularly well in this recipe.
How Do I Know When Chicken Tenders Are Fully Cooked?
The safest way is to use an instant-read thermometer. Insert it into the thickest part of the chicken. It should register 165°F (74°C).
Don’t rely on the outside color alone because golden breading doesn’t always mean the chicken has cooked completely.
Can I Make Fried Chicken Tenders Ahead of Time?
Yes. You can marinate the chicken in advance and prepare the seasoned flour mixture separately.
For the best texture, bread and fry the chicken shortly before serving. If you need to cook it ahead, refrigerate the finished tenders promptly and reheat them in the oven.
How Do I Store and Reheat Leftover Chicken Tenders?
Allow the chicken to cool, then refrigerate it in an airtight container within 2 hours of cooking.
Keep leftovers refrigerated for 3–4 days.
To reheat, arrange the tenders on a wire rack over a baking sheet and place them in a preheated 350°F (175°C) oven for approximately 10–15 minutes, or until thoroughly heated to 165°F (74°C).
Avoid the microwave if you want to preserve the crispy coating because it tends to soften fried breading.
Can I Freeze Homemade Chicken Tenders?
Yes! Let the cooked tenders cool completely, then freeze them in a single layer before transferring them to a freezer-safe container or bag.
For best quality, use within 3 months.
Reheat directly from frozen in a 375°F (190°C) oven until hot throughout and crispy, checking the internal temperature before serving.
Final Thoughts
These homemade Fried Chicken Tenders prove that you don’t need a restaurant kitchen to enjoy perfectly crunchy chicken.
With a flavorful buttermilk marinade, a seasoned flour and cornstarch coating, and the right frying temperature, you can create golden, crispy tenders with juicy centers every time.
Remember the little details: let the breading rest, fry in batches, and always use a wire rack for draining. Those simple techniques make all the difference!
Serve them with your favorite dipping sauces, add some crispy potatoes on the side, and you’ve got a meal everyone will be excited to eat.
Print
Fried Chicken Tenders Recipe That Stays Crunchy – Crispy, Juicy & Easy
- Total Time: 1 hour 5 mins
- Yield: 6 servings
Description
These homemade fried chicken tenders feature a golden, crunchy coating and juicy, tender chicken inside. Made with a flavorful buttermilk marinade, seasoned flour, and cornstarch, they’re perfect for family dinners, lunches, or dipping into your favorite sauces.
Ingredients
1½ pounds chicken tenderloins
1 cup buttermilk
1 large egg
1 teaspoon salt
½ teaspoon black pepper
1 teaspoon garlic powder
½ teaspoon paprika
½ teaspoon onion powder
1 teaspoon hot sauce (optional)
1 cup all-purpose flour
½ cup cornstarch
1 teaspoon baking powder
1 teaspoon paprika
1 teaspoon garlic powder
½ teaspoon onion powder
½ teaspoon salt
½ teaspoon black pepper
¼ teaspoon cayenne pepper (optional)
Vegetable, canola, or peanut oil, for frying
Instructions
1. Place chicken tenderloins in a large bowl with buttermilk, egg, salt, pepper, garlic powder, paprika, onion powder, and optional hot sauce. Mix until coated.
2. Cover and refrigerate for at least 30 minutes, or up to 4 hours.
3. In a separate bowl, whisk together flour, cornstarch, baking powder, paprika, garlic powder, onion powder, salt, black pepper, and cayenne pepper.
4. Add 1–2 tablespoons of the buttermilk marinade to the flour mixture and gently mix to create small clumps for extra crunch.
5. Remove chicken from the marinade, allowing excess liquid to drip off.
6. Coat each tender thoroughly in the seasoned flour mixture, pressing firmly so the breading sticks. For extra crunch, dip briefly back into the marinade and coat in flour again.
7. Place breaded chicken on a wire rack and let rest for 10–15 minutes.
8. Heat 1½–2 inches of oil in a heavy-bottomed skillet or Dutch oven to 350°F (175°C).
9. Fry chicken tenders in small batches for approximately 3–5 minutes per side until golden brown and crispy.
10. Check that the thickest part of each tender reaches an internal temperature of 165°F (74°C).
11. Transfer cooked chicken to a clean wire rack to drain. Repeat with remaining chicken and serve hot.
Notes
Keep the frying oil around 350°F (175°C) for the crispiest results.
Avoid overcrowding the pan because it lowers the oil temperature.
Adding cornstarch helps create a lighter, crunchier coating.
Let the breaded chicken rest for 10–15 minutes before frying.
Always drain fried chicken on a wire rack instead of paper towels to help prevent sogginess.
Serve with honey mustard, ranch, BBQ sauce, or buffalo sauce.
Refrigerate leftovers in an airtight container for 3–4 days.
Reheat in a 350°F (175°C) oven until the chicken reaches 165°F (74°C).
- Prep Time: 45 mins
- Cook Time: 20 mins
- Category: Dinner / Lunch
- Method: Deep Frying
- Cuisine: American